EASY SCIENCE EXPERIMENT FOR KIDS - 3 INGREDIENTSNeed an easy science experiment to do with your kids? You'll only need three simple ingredients. Next time you are at Trader Joe's or the grocery store, grab some white flowers and you'll be ready to go! Watch the video below or keep reading for step-by-step instructions. Here's what you need:
Trim the flowers and add them to a vase with water. Select a food coloring container to add to the water. (Here's a tip: choose blue or purple for the experiment to work better) Watch the white flowers slowly begin to turn colors as they start to drink the colored water. Blue and purple work better because these molecules are smaller and travel much more easily up the stem of the flower. My kids at so much fun tracking the color of these flowers every single day while we did it. It also didn't take long for the color to transfer. Once you are done with the easy STEM experiment for kids, try my flower activity linked here before you throw away those old flowers. 
0 Comments
SAVE THOSE OLD FLOWERS - CUTTING PRACTICE + ART ACTIVITY FOR KIDSHave some old flowers that are starting to turn brown? I am GUILTY of buying pretty flowers at Trader Joes or the grocery store when I am out. However, this time around, I happened to have some old flowers from another science experiment we were doing. They had already turned colors with the food coloring (new post on this coming soon!) and we were ready to toss them out. I remembered an activity I had seen The Busy Toddler post around Valentines Day and decided to give it a shot. Normally, I let Teddy take the flowers outside and "Isabella" them. Basically, he throws the flowers around, usually ripping off petals and spinning in circles to look like Isabella from Encanto. This usually makes a huge mess, so I decided to try something a little bit different and let the kids just cut away at the flowers in their activity plastic tub. This was a great idea. Because it was DIFFERENT! Cal usually has NO INTEREST in cutting practice and holding scissors properly, but he actually was interested in trying because he had never been allowed to cut flowers before. Teddy absolutely loved the activity of cutting old flowers too and even took the cutting practice one step further and created an art project with the petals. He taped the petals in patterns on his paper to make a pretty picture. Cutting inside the plastic bin made clean up so much easier than when they "Isabella" flowers outside. It also was a teaching moment with that cutting practice and, of course, a fun activity to do with the kids and the old flowers.
How To Throw A Cheap Party With KidsI am the first one to bargain hunt when throwing a party. I never realized how expensive parties are and how tricky it is to throw a cheap party. In our house, we throw parties for EVERYTHING. Literally everything. You can look at how to throw a dog birthday here. You can look at how to throw a Bluey birthday here. Why Throw So Many Parties With KidsWhy do we throw so many "parties"?
How to Keep Parties Cheap for KidsThat being said, if we are throwing so many different parties, we have to recycle various decorations. We have multiple "Decoration" tubs in our laundry room. We try hard not to throw decorations away and we recycle and reuse. The Dollar Tree is our favorite Party Store. Different Dollar Tree locations sometimes have different decorations. No matter how often we visit, I feel like we never know what we are going to find. Amazon also has some good deals when you are buying party supplies in bulk. As easy as Party City and Oriental Trading are, they are sometimes pricier and not my favorite places to go to when trying to save a buck throwing a cheap party. We like to make our own decorations when we can. The kids can color pictures or make large posters for the party. I have so many videos and tutorials on how to make cardboard cut-outs. These decorations cost us about $.50 for the poster board and they really fill up the space and take up some creative time to do. Buy food and drinks when they are on sale. For example, I stock up on soda and bags of chips when they are on sale at the grocery store or Target. I keep them in the pantry because we never know when we might need to celebrate something! I also always keep a jar of salsa or cheese dip on hand too. Save all unused paper plates, plastic silverware, and party napkins. We have mason jars of plastic silverware ready to go that we can just bring out in a moment's notice for a party. Even if the party plates don't necessarily match the theme, the feeling of having party plates add to the party feeling. No one gets too picky when they know the kids threw the party together. Example of a Cheap Party Thrown By KidsOnce we get into the playoffs of sports, we like to throw "parties" when we watch the game. The kids don't particularly care about the game at all, but they are more apt to let us enjoy the game when they got to decorate and continue decorating for the party. For our last football party, it took the kids HOURS to decorate and it cost me about $5 to help them with the supplies. First, we had streamers that we purchased before and used some of the colors. PRO TIP - buy these at the Dollar Tree not at Party City where they mark the pricing up on them.  Then we made our own decorations. We made posters for the sports team we were cheering on. Sure, we outlined some, but Teddy also drew and created his own signs.  Investing in plastic table clothes and paper plates/napkins is an easy way to stick to the color scheme and theme of the party. You can snag them at the Dollar Store too.  Recycling and reusing decorations is the way to go! You never know when a theme may come back around!  No one can talk me out of believing that throwing a cheap party is a fun activity to get the kids involved in what's going on. Throwing a cheap party is silly but rewarding! See it all come together here: Haunted Mansion Hitchhiking Ghost ActivityHave you watched the new Haunted Mansion movie? What perfect timing to release a haunted mansion film. It definitely got me thinking about haunted mansion related craft ideas we could do. There are so many cute Haunted Mansion decor ideas out there to purchase, but we really like to channel our DIY spirit to be unique. Since our Bluey cut-outs were such a hit at Teddy's birthday, we decided to do a little haunted twist on them! (If you haven't checked out the Bluey cut-out tutorial, I linked it above. It's definitely worth a glance to get the nitty gritty of how to create these projected cut-outs.) Our favorite characters are, of course, the Haunted Mansion Hitchhiking Ghosts. We got a little dancing one last year at Home Depot and since then, my kids love their cute little outlines. Also, if you've seen the new movie, they are definitely less scary than the Hatbox Ghost right now. I bet you could also try this technique on the singing ghost busts. What You Need To Create the Haunted Mansion Hitchhiking Ghosts
 How to Create the Haunted Mansion Hitchhiking GhostsFor a crash course on creating the Haunted Mansion Hitchhiking Ghosts, you can watch the reel below.
You can also follow the below directions: 1. Assemble your poster board and pencils. Hook up your computer to the projector, so that your projector is shining on a blank wall. Tape the poster board to the wall behind the image you are projecting. I found the webpage with Doodleman Dan to have some of the best standard images to project. I went ahead and copied the image into a Word Document, so I could save it and also enlarge the different ghosts as needed. 2. Trace the outline of the image with pencil. 3. Repeat for all three Haunted Mansion hitchhiking ghosts. 4. Then you are ready to paint! I am torn whether I liked outlining the pencil marks in Sharpee before painting. You definitely have to do it after as well. Teddy helped me with some of the painting and it was kind of nice to have a clear division of Sharpee for his painting skills before he started working. 5. Paint the images to match the pictures you saved in a Word Doc for future reference (right now). 6. Once the paint dries, outline the sections in Sharpee again. We ended up outlining two times. The paint really seems to dry out the Sharpees quickly, so you'll want to make sure to have quite a few on-hand unless you are better at staying in the lines than we are! Let me know if you have any hints on how to avoid drying out those markers. Drop comments below! 7. Cut around the edges! I liked leaving a little outline border rather than cutting right along the character themself. Pumpkin Patch Project Idea for Toddlers We started our pumpkin patch project by building the pumpkin patch of course. I got this nice wooden unfinished pumpkin sign from Hobby Lobby for about $1. This worked as our perfect stencil for the pumpkin patch. We also purchased a roll of brown craft paper from Hobby Lobby for around $3.  Activity 1: Fine Motor Skills - Trace the PumpkinsTeddy got some great practice outlining the pumpkin stencils on the brown craft paper roll. This is great for those fine motor skills of writing and tracing/outlining. Activity 2: Creativity - Decorate the Pumpkins The boys loved being able to decorate their own pumpkin patch without rules or restrictions. Teddy opted for making pumpkin faces and jack-o-lantern heads while Cal wanted to color as many pumpkins as he could as quickly as he could! Activity 3: Handwriting PracticeThen we needed to add some real orange pumpkins to our pumpkin patch. I had purchased these die-cut pumpkins from Hobby Lobby (again) for about $2. You could definitely just use post-it notes for this part too if you didn't want to get pumpkins or make any sort of pumpkin cut-out. Teddy went through and wrote a letter of the alphabet on each pumpkin. This was great handwriting practice because we got to talk about how he forms each letter rather than just creating them on his own.
Activity 4: Alphabet Practice - Hide and Seek with the PumpkinsAt this point, I took all of the newly lettered pumpkins and hid them around the house for the kids to find. They had so much fun looking for them. Then, they had to work together to sing the alphabet and place the pumpkins in the correct order in the patch. It was so cute watching them work together and watch Teddy think through exactly where all those pumpkins needed to go. It was great alphabet letter recognition practice for him.
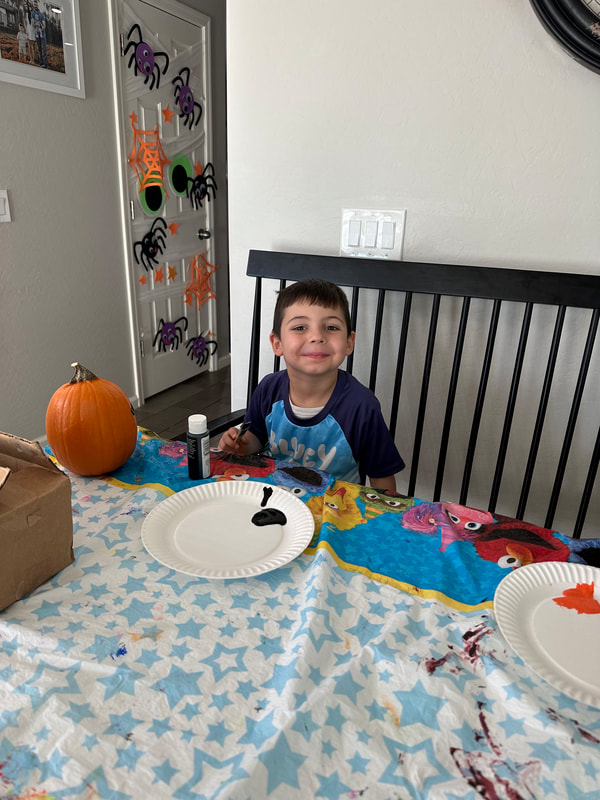
Activity 5: Letter/Sound Practice - Find Toys That Begin with the Same LetterOnce we had all the correct pumpkin letters placed in alphabetical order, the boys had to find toys that matched the beginning letters and place them in the "pumpkin patch." This was our long lasting pumpkin patch project idea. It probably took the boys an hour to complete all the activities and talk through them. We had a great time and they were tired from all the pumpkin brain power they needed!  Simple Pumpkin Painting IdeasWe have simple pumpkin painting ideas for big pumpkins to little pumpkins for kids of all ages. We love pumpkin season. Personally, I am torn between purchasing the beautiful real pumpkins versus the spacious fake pumpkins. I know with the real pumpkins, we invest in them every year just to see them rot and wither away in the warm Arizona weather. However, the fact that those fake pumpkins last season to season is both a blessing and a curse. Why? Storage. There is NEVER enough storage especially for those spacious pumpkin pieces that don't collapse down. There is a local pumpkin patch here that includes a small pumpkin with the entrance fee. That's how we stumbled upon coming up with simple pumpkin painting ideas. We needed a fun, quick and definitely simply way to paint our pumpkins. They are too small to carve but we still wanted to be festive and decorate them! Crayola Paint Stick PumpkinsI stumbled upon these Crayola Paint Sticks last year and think they are literally the greatest and easiest way for kids to paint. They are especially easy when painting odd-shaped objects like pumpkins and wanting to contain the mess to a smaller area. We love free play. Free play encourages creativity. There are times when my kids like to follow step-by-step directions, but most of the time, they like to follow their own free spirits when it comes to creating, crafting, and in this case, painting. For this Type A Mama, that free-spirited crafting can sometimes be stressful - the mess, the uncoordinated colors. It's a good exercise for them, just like it's a good exercise for me to embrace the unpredictable!
What we love most about these marker sticks is the minimal mess, the lasting color, and the ease of use for kids as young as 1-2. You can use the sticks to create more tailored images - like ghosts, pumpkins, bats or spiders. But for my kids, they loved being able to use them to create patterns, dots, and images that they wanted to do. They also used them to easily draw a face on certain areas of their pumpkins. For super simple pumpkin painting ideas, this is definitely the easiest tool to grab. Simple Free Paint Pumpkin IdeasThis year the kids wanted to try something new and do free painting on their pumpkins. They wanted to use all the liquid paint colors that we had stocked up over the past couple years and incorporate them onto their pumpkin painting. Free painting is, of course, amazing for encouraging creativity. Also, if you establish great rules and routines around how to use liquid paint early on, then it saves you stress in the long run. I've also come to invest in one of those plastic table covers from the dollar store as our go-to paint covering. We use it over and over again for painting and it's quick set up and quick clean up. With the free painting, Cal decided to just paint away with whatever colors he chose. He was so concentrated on the activity. It was great for his fine motor movements. Teddy, however, being a little bit older this year was able to use his free painting time to sketch Nightmare Before Christmas characters on his pumpkin. It was one step harder than the marker paint sticks, but still a super simple pumpkin painting idea.
We love our sensory bin container and are always look for new ways to use it. We borrowed and adapted this idea from Busy Toddler. She often shares different ideas to wash toys and incorporate "baths" with your beloved sensory bin. We got this bin from Target, but you can really use any sized bin you'd like. I think the "under the bed" bins work best. They give you more space to play and the sides aren't too high for little arms to have much trouble reaching inside.  Once you have your bin, then you can start incorporating different themed ideas to celebrate holidays, seasons, and just things that your kids love. We had visited a local pumpkin patch. Part of the admission was that you got to select your own pumpkin from the "patch" to take home with you. The nice thing about the included pumpkins was that they weren't huge carving pumpkins. They were a nice kid-sized pumpkin. The kids got to pick their pumpkins and bring them home for all the activities we had planned.
When we picked the pumpkins from the "patch," they were actually super dirty, so this activity just naturally seemed to happen. We decided to give our pumpkins a special bath. I added water to the sensory bin (spread out a large tablecloth/towel/mat underneath for any spilling water). You could definitely do this outside if the weather is nice by you. Here it was still pretty hot in the afternoon by the time we got home, so we wanted to wash pumpkins inside. Add some Dawn dishsoap or even some bubble bath. Since we aren't eating the pumpkins, we really just want to get them clean with the most gentle soap for kids that we can use. We made sure to make bubbles though, because that adds the fun! I had some travel tooth brushes on-hand to use for scrubbing. We had washcloths for washing and extra towels for drying.
Once the pumpkins were cleaned off, they were ready for our next activities and they were allowed to wait in the house for those! Hellooooo Hobby Lobbby Finds!- $1.50 Fall Paper ChainA little hard for Teddy to put together at first, but once he got the hang of it, he was clipping right along. It's nice because they have pre-cut notches to hook together on the thick paper, so we didn't have to tape each one. We are using it as a paper chain countdown to Halloween which gives the craft purpose (and means it won't stay out on display FOREVER). It took about 10-15 minutes to construct depending on how much help I could provide.
Want a fun, easy STEM Halloween-themed activity to do with your kids? Try this Witch's Brew! What you need:
What to Do:1. Place your cauldron on your cookie sheet or plate. Add about 1 tablespoon of baking soda to the bottom of your cauldron or cup. 2. Add a few drops of food coloring to the baking soda in the cauldron. 3. Fill your spoon or eye dropper with vinegar. 4. Drop a few drops of vinegar into the cauldron. Add more vinegar for a faster and larger chemical reaction. 5. Watch the potion bubble over! Why Does It do This? The classic baking soda and vinegar experiment is called an acid/base reaction. Vinegar is an acid and baking soda is a base. The bubbles that are created are carbon dioxide being released from the reaction. Learn more about it here. Check out our Instagram reel of this!Need a fun, easy Easter activity to keep your preschoolers or even elementary schoolers busy? We LOVE making gingerbread houses around Christmas time, so we've converted this idea to Easter time for a couple years now. We've made bunny/chick houses for our Peep candy friends. I was at the store the other day and saw that they make kits for these now. We've been using different ingredients around the house (looking at you leftover Halloween candy bag) to decorate and graham crackers for a cheap, fun Easter activity! The kids LOVE to eat all the candy as they decorate (in moderation, of course). However, once the candy is on the house, they can't eat it. I've found that the houses/crackers don't stay too well together with just icing. I've been prepping the activity by doing the following steps to make it run smoother: 1) Hot glue the crackers together to eliminate any frustrations of them continually falling down. 2) Pre-make any colored icing options - eliminates meltdowns and messes with food coloring 3) Have all the ingredient/candy/sprinkle options all out and ready 4) We use plates or cookie sheets, but always make sure to cover them with foil first for easy clean up at the end! These Easter Bunny Houses are always a fun success and easy activity the kids look forward to each year!
|


 RSS Feed